
Photo Protocol for Tracking Hair Loss: How to Document Honestly
Mirror checks lie. Cameras under controlled conditions do not. The four-variable photo protocol that lets you read your own hair loss progress accurately.

The single most useful tool in any hair loss protocol is a phone camera. Without standardized photos at consistent intervals, you cannot tell if your protocol is working, plateauing, or quietly failing. The eye lies. The mirror lies in both directions – good days look like progress, bad days look like emergency. Cameras do not lie if the conditions are controlled. Setting up an honest photo protocol is the difference between knowing what is happening and guessing.
Quick answer: standardize lighting, angles, hair prep, and timing
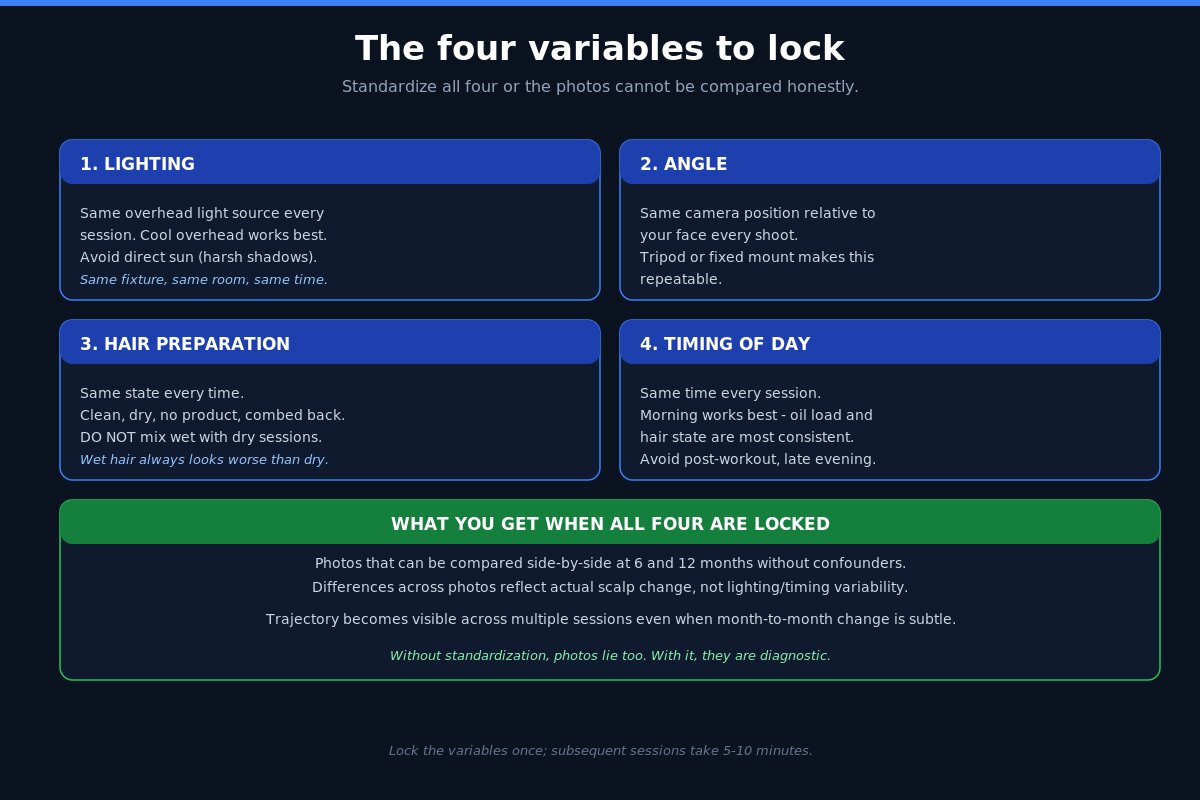
A useful photo protocol has four controllable variables and you have to lock all four. Same lighting (cool overhead, no direct sun, no shadow flickers). Same angles (front, both sides, top-down, back). Same hair preparation (clean, dry, no product, combed back if usually styled, parted in the middle for top-down). Same timing of day (morning works because oil load is consistent). Take 5-7 photos per session. Repeat monthly. Compare side-by-side at 6 and 12 months. The eye cannot detect the slow changes that the camera captures across that interval.
This is the boring fundamental of hair loss protocol management and almost nobody does it consistently. Doing it correctly is more useful than the next supplement or device on your list.
Why mirror checks lie
The mirror is unreliable for hair loss tracking because of three confounders.
Lighting variability. Bathroom lighting changes throughout the day. Overhead fluorescent at 7 AM versus warm bedside lamp at 11 PM versus daylight at noon – these produce completely different visual impressions of the same scalp. The same hair pattern looks dramatically different.
Hair state variability. Wet hair clumps together and reveals scalp dramatically. Dry styled hair conceals scalp. Slept-on hair shows oil channels. Product-treated hair looks different from clean. Without a fixed hair state, comparison is impossible.
Confirmation bias. The brain looks for evidence that confirms its current emotional state. Anxiety days produce “I am losing it fast” mirror reads. Confidence days produce “I think it is holding” reads. The same scalp produces both readings within hours. The brain is not a measurement instrument.
Photographs taken under controlled conditions remove all three confounders. The lighting is fixed by design. The hair state is fixed by your prep protocol. The camera’s interpretation does not change with your mood.
The four-variable protocol
The four things to control on every shoot.
Lighting. Use the same light source at the same time every session. Cool overhead light works best for showing scalp visibility. Direct sunlight is bad – too harsh, casts shadows that vary by season and time. Bathroom or hallway with consistent overhead fixtures is fine. The key is identical light setup every time.
Angle. Use the same camera position relative to your face every shoot. Most easily achieved by mounting the phone on a tripod or stand at a fixed height. Front view: phone at eye level, 18 inches away, head straight. Both side views: phone at temple height. Top-down: phone above the head pointing straight down (someone else holds it, or use a selfie stick + grid lines). Back view: someone else takes it, phone at occipital protuberance height.
Hair preparation. Same state every time. Clean, dry, no product is the standard for showing actual scalp. Combed in a single fixed direction. If you part your hair in your normal styling, also take a parted-style version – both have value. Most important: do not photograph wet hair on one session and dry on another. Wet hair always looks worse.
Timing of day. Same time on every shoot. Morning works for most people because oil load and hair shaft state are most consistent overnight. Avoid late evening when hair has been worked on all day. Avoid post-workout when sweat has affected the hair.
The angles that actually matter
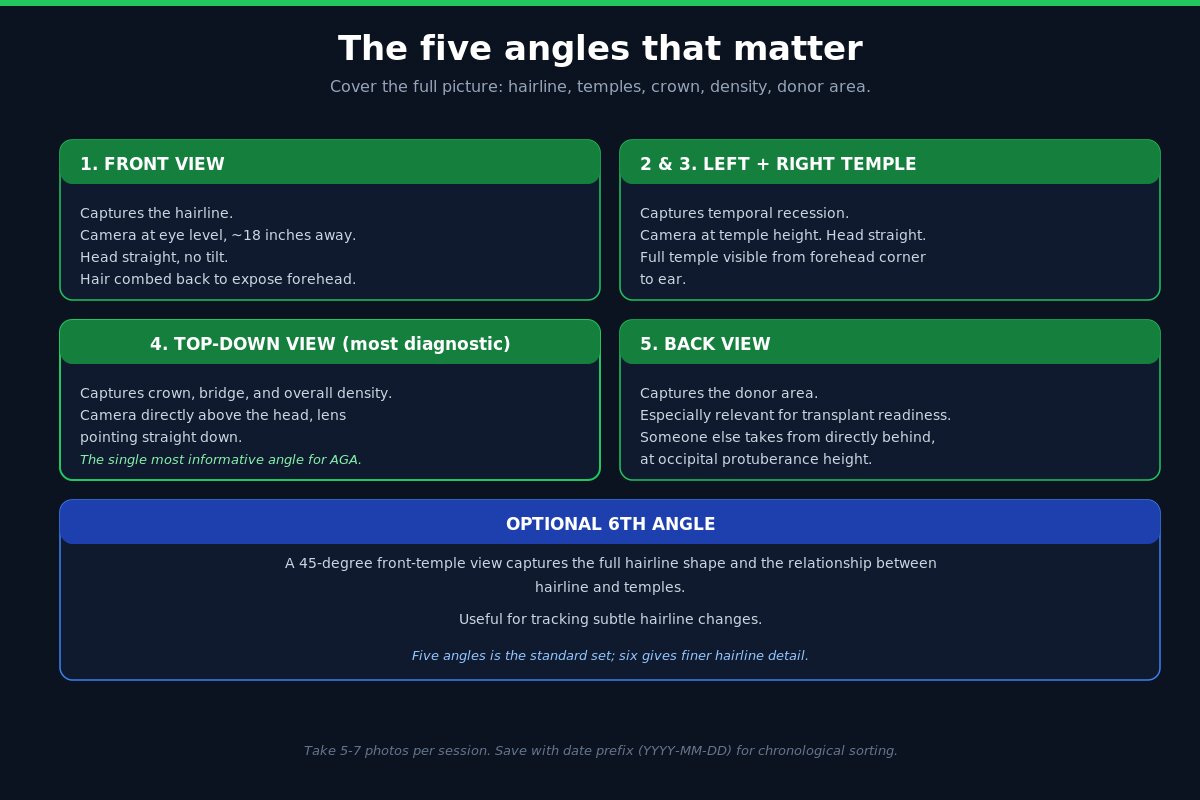
Five angles cover the full picture.
Front view. Captures the hairline. Camera at eye level. Head straight. No tilt. Hair combed back to expose forehead and hairline.
Left and right side (temple) views. Captures temporal recession. Camera at temple height. Head straight, looking forward. The full temple from the corner of the forehead back to the ear should be visible.
Top-down view. The single most diagnostic view for AGA. Captures the crown, the bridge between hairline and crown, and overall density across the top. Camera directly above the head, lens pointing straight down. This is the hardest shot to take alone but the most informative.
Back view. Captures the donor area. Especially relevant if you are evaluating transplant readiness. Someone else takes this shot from directly behind, camera at the occipital protuberance height.
Some men benefit from a fifth angle: a 45-degree front-temple view that captures the full hairline shape and the relationship between the hairline and the temples. Useful for tracking subtle hairline changes.
Watch this for the timeline framing
This video covers why the photo timeline that matters is months, not weeks. Most “my hair is failing” panic happens in the 2-8 week window where actual hair cycle changes have not yet appeared. Photo protocol exists precisely to remove that anxiety – the photos either show change at 3-6 months or they do not, and that is the diagnostic.
How often to take photos
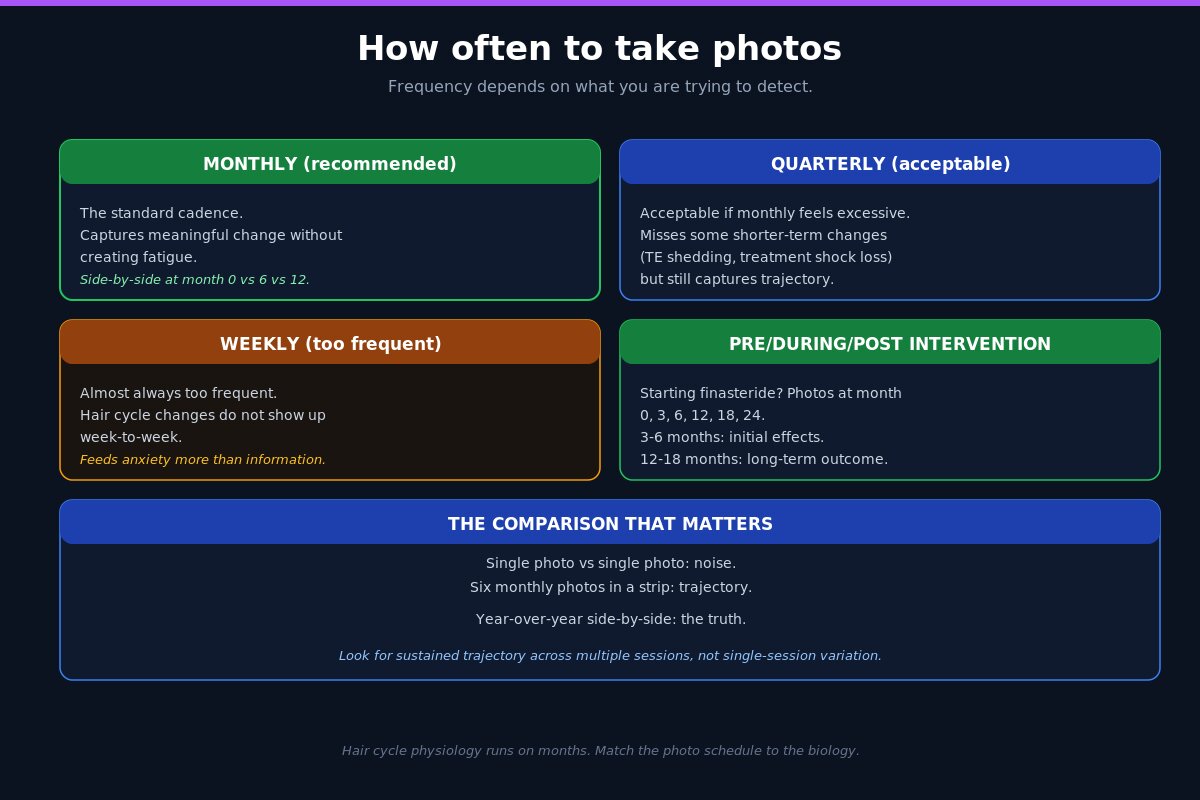
Frequency depends on what you are trying to detect.
Monthly. The standard cadence. Captures meaningful change while not creating fatigue. Side-by-side comparison of month 0 vs month 6 vs month 12 is the most useful diagnostic for protocol assessment.
Quarterly. Acceptable if monthly feels excessive. Misses some shorter-term changes (TE shedding episodes, treatment-onset shock loss patterns) but still captures the trajectory.
Weekly. Almost always too frequent. Hair cycle changes do not show up week-to-week. Weekly photos can feed anxiety more than information.
Pre/during/post a specific intervention. If starting finasteride, take photos at month 0, 3, 6, 12, 18, 24. Same for any major protocol change. The 3-6 month window is when initial effects appear; 12-18 months is when long-term outcome stabilizes.
Setting up a repeatable shoot
The first session takes 30 minutes. Subsequent sessions take 5-10 minutes if you set up correctly the first time.
One-time setup. Pick a location with consistent overhead lighting (a bathroom or hallway works). Mark phone or tripod position with tape on the floor or wall. Decide on hair preparation (clean, dry, no product, combed back). Take baseline photos.
Each session. Same time of day, same hair prep, same location, same camera angle. Take 5-7 photos covering the full angle set. Save with date in the filename (YYYY-MM-DD prefix makes them sort chronologically).
Tools. Phone is sufficient. Tripod or stand is helpful. A second person to take the back view is helpful but not required – a small mirror plus phone selfie can substitute.
Storage. Cloud sync (iCloud Photos, Google Photos) creates an automatic backup. Folder named “Hair tracking [year]” keeps it organized.
How to compare across time
Side-by-side comparison is the only way to read changes accurately.
Same-angle comparison. Place the same angle at month 0 and month 6 next to each other. Look for: hairline position, temporal recession depth, crown thinning, overall density change.
Multi-month strips. Six photos in a row showing the same angle across six monthly intervals. Trajectory is visible across the strip even when month-to-month changes are subtle.
Standardized cropping. Crop both photos identically (same dimensions, same head position) to remove distractions. Apps like Hair Loss Tracker, AppForType, or just Photoshop crops work.
Avoid filter or enhancement. Photos taken under controlled conditions and shown unenhanced are the diagnostic. Filters and beauty modes make hair loss tracking impossible.
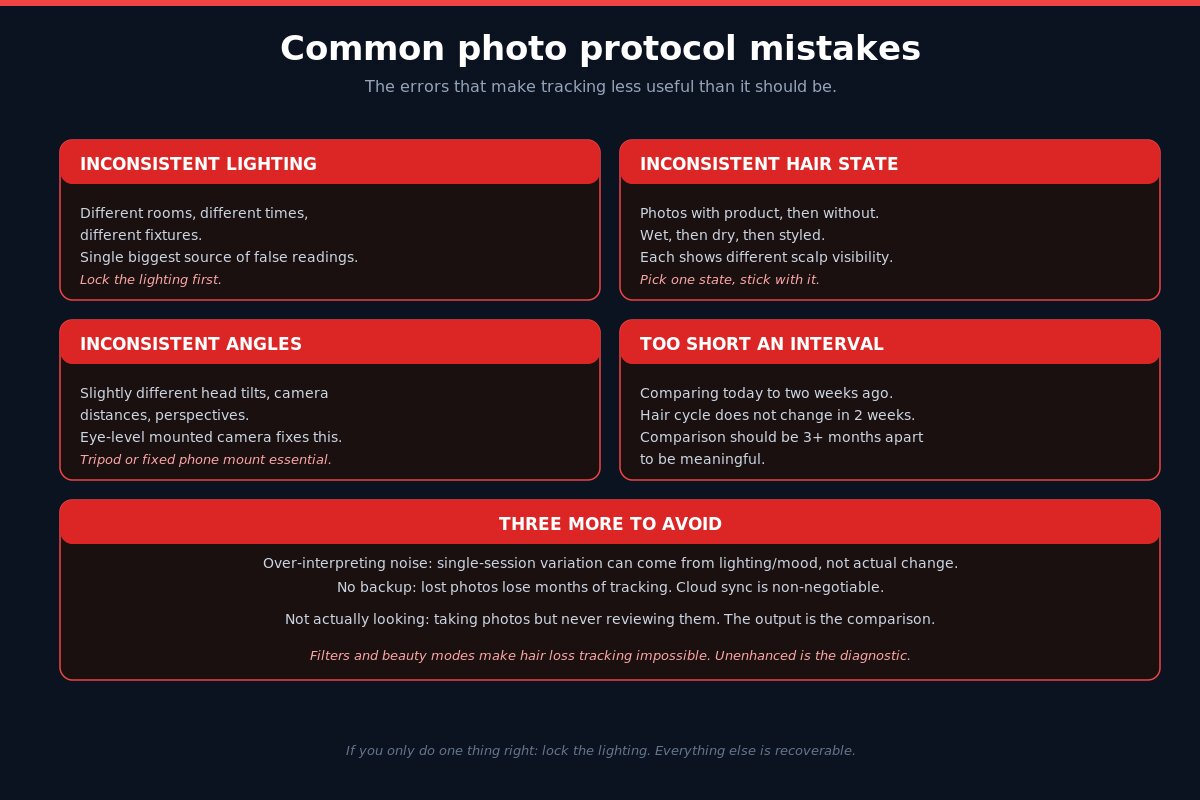
Common photo protocol mistakes
The errors that make photo tracking less useful than it should be.
Inconsistent lighting. Different rooms, different times of day, different fixtures. The single biggest source of false readings. Lock the lighting.
Inconsistent hair state. Photos with product, then without, then post-shower wet, then dry. Each shows different scalp visibility. Pick one state and stick with it.
Inconsistent angles. Slightly different head tilts, different camera distances, different perspectives. Eye-level mounted camera fixes this.
Too short an interval. Comparing today to two weeks ago. Hair cycle does not change in two weeks. Comparing today to three months ago is the meaningful comparison.
Over-interpreting noise. Slight variations between photos can come from lighting, mood, hair styling, or camera differences – not from actual scalp change. Look for sustained trajectory across multiple sessions, not single-session variation.
No backup. Lost photos lose a year of tracking. Cloud backup is non-negotiable.
Not actually looking. Taking photos but never reviewing them. The output of the protocol is the comparison; if you never compare, the photos do not help.
Reading the changes correctly
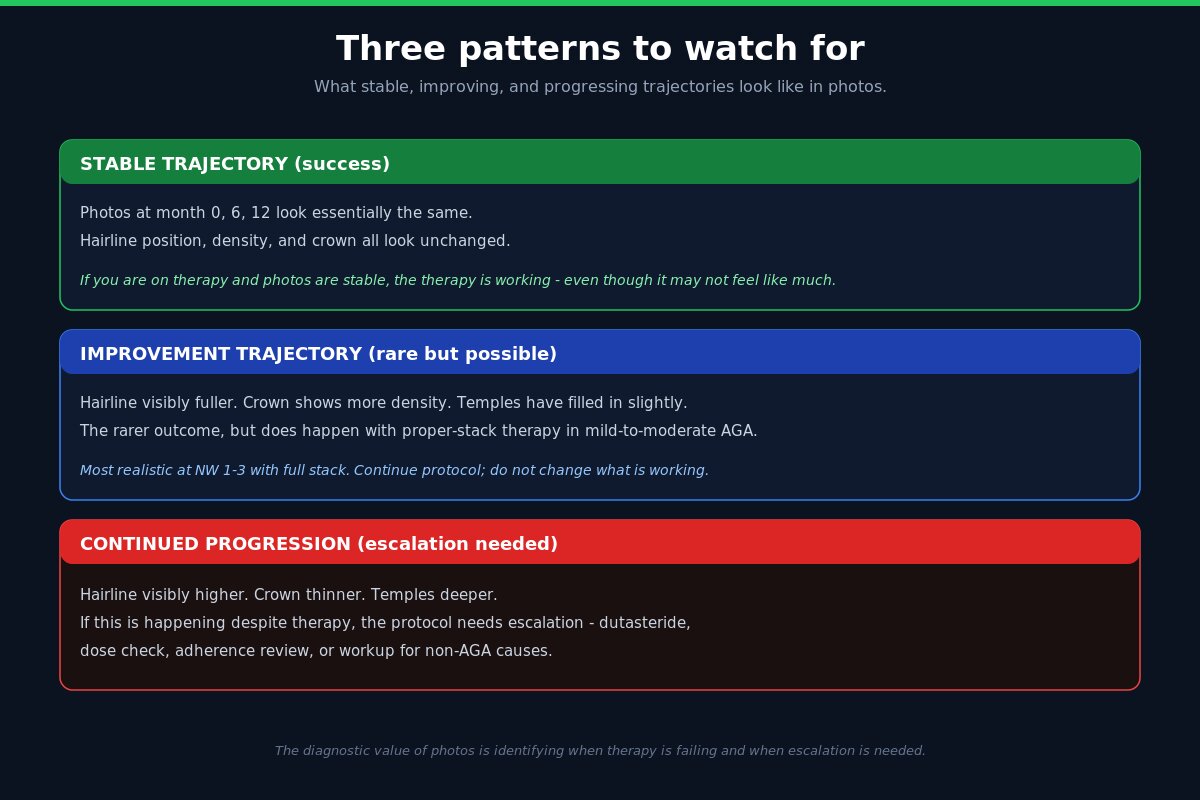
Three patterns to watch for in your comparisons.
Stable trajectory. Photos at month 0, 6, 12 look essentially the same. Hairline position, density, and crown all look unchanged. This is what successful preservation looks like. If you are on therapy and the photos are stable, the therapy is working – even though it does not feel like much.
Improvement trajectory. Hairline visibly fuller. Crown shows more density. Temples have filled in slightly. This is the rarer outcome but does happen with proper-stack therapy in mild-to-moderate AGA.
Continued progression. Hairline visibly higher. Crown thinner. Temples deeper. If this is happening despite therapy, the protocol needs escalation – dutasteride, dose check, adherence review, or workup for non-AGA causes.
The diagnostic value of photos is not just confirming progress; it is identifying when therapy is failing and when escalation is needed.
Photo protocol for transplant evaluation
If you are considering a transplant, the photo timeline becomes a critical preoperative tool.
Pre-medical-therapy baseline. Photos before starting finasteride or other treatments.
Stability documentation. Photos every 6 months on therapy. Surgeons want to see 12-24 months of stable therapy before operating. Without photos, you cannot prove stability.
Pre-operative photos. Same standardized angles taken close to the surgery date.
Post-operative tracking. Standardized photos at month 0 (post-op), 3, 6, 9, 12, 18. Visible regrowth typically starts month 4-6, with most of the result visible at 12-15 months.
This complete photo timeline is what good surgeons want to see and what good results require to evaluate.
Common myths and where they fail
“I will know if my hair is changing.” Most men do not. Subtle daily changes accumulate without registering until a friend or partner says something, by which point months have passed. Photos catch the trajectory before the eye does.
“Selfies are good enough.” Selfies vary in angle, lighting, and distance more than mounted-camera shots. Use a tripod or fixed mount for the standardized shoots; selfies fine for casual sharing.
“I just need before and after.” Two photos is a snapshot; six monthly photos is a trajectory. Trajectory is what tells you if the protocol is working.
“Better camera, better tracking.” Phone camera is sufficient. Consistency matters more than resolution.
“I should photograph after a haircut to look my best.” Photograph at the most-honest hair length, which is typically grown out enough to show density patterns, not freshly cut to maximize fullness.
Frequently asked questions about hair loss photo tracking
How often should I take photos?
Monthly is the standard cadence. Quarterly is acceptable. Weekly is too frequent and produces anxiety more than information.
What kind of camera do I need?
Your phone is sufficient. Resolution matters less than consistency. Mounted at the same position with the same lighting beats a high-end camera held at varying distances.
What time of day should I take photos?
Same time every session, ideally morning. Oil load and hair state are most consistent in the morning. Avoid post-workout, post-shower (wet hair always looks worse), and late evening.
Should I have someone else take the photos?
Useful for back view and top-down. Front and side views can be done alone with a tripod or fixed phone mount. The back view is the hardest to do solo.
What if I forget a month?
Take it as soon as you remember and continue the schedule. One missed month is not a problem; chronic gaps reduce the value of the tracking.
Should I share my photos online for feedback?
Optional. Reddit hair loss communities can offer perspective but also generate anxiety from the volume of “is this normal” replies. If you do share, redact identifying details.
How do I know if my protocol is working?
Photos at month 0, 6, 12 should show stable or improved density compared to baseline. If month 12 shows worse density than month 0 despite consistent therapy, the protocol needs escalation or the diagnosis needs review.
Can apps help with photo tracking?
Some apps assist with consistent angles and side-by-side comparison. Useful for those who want guidance. Not strictly necessary – manual organization in a cloud-synced folder works fine.
Should I include photos with product or styled hair?
Optional secondary set. Primary tracking should be on clean, dry, unstyled hair to show actual scalp. A secondary “how my hair looks day to day” set is useful for confidence tracking but not for objective trajectory.
How do I share photos with a dermatologist or transplant surgeon?
Email or a shared cloud folder with the standardized photo set across multiple time points. Doctors prefer trajectory over single-time-point images for the same reasons you do.
Bringing it together
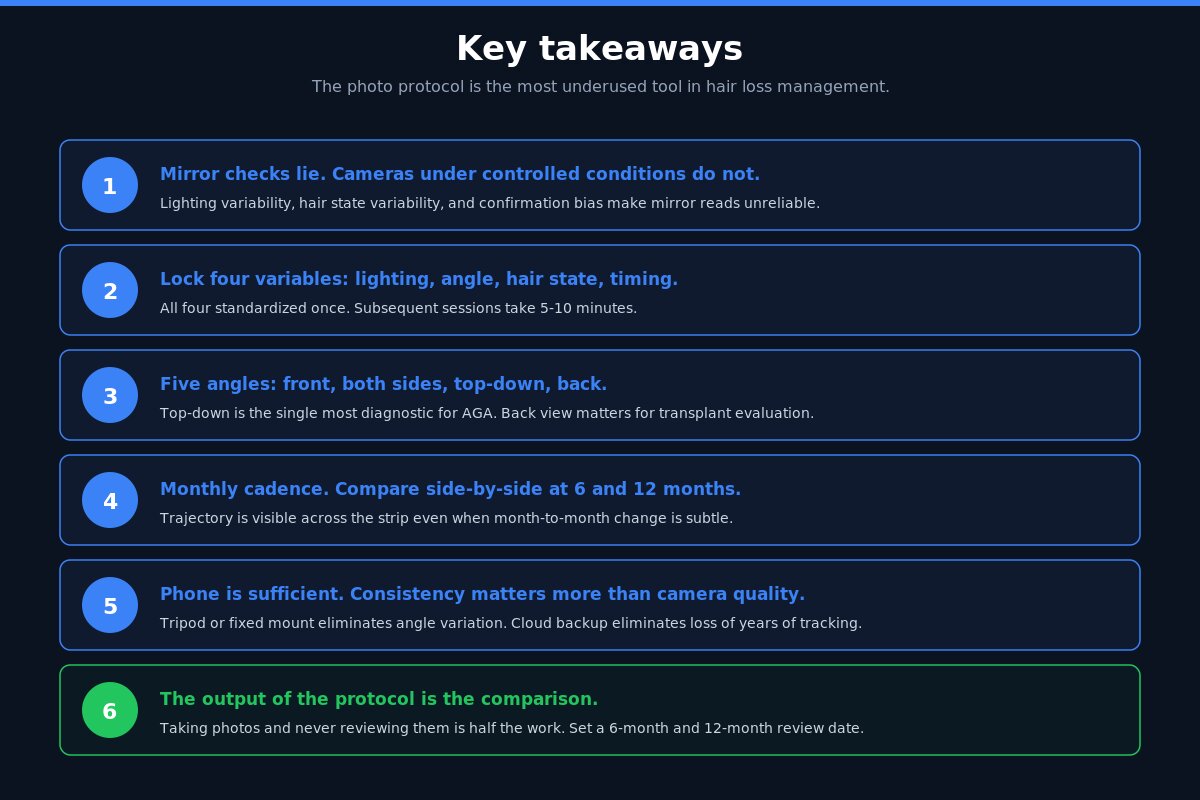
The photo protocol is the single most underused tool in hair loss management. Phone camera, fixed lighting, fixed angles, fixed hair state, monthly cadence, side-by-side comparison at 6 and 12 months. That is the entire protocol. Implementing it correctly puts you ahead of 90 percent of men trying to manage their hair loss because most never document anything systematically. The biology of hair loss happens on the timescale of months; the eye cannot perceive that timescale; the camera can.
If your photos are showing continued progression despite therapy, the protocol needs revisiting – the framework for that is in why your protocol may not be working. If you are using photos to evaluate progress on a specific intervention like microneedling or topical, see the microneedling protocol for what realistic timelines look like. And for an honest counterweight to the optimistic before/after photos that flood social media, the case-data analysis on Reddit progress posts shows what those photos often hide.
This article is for educational purposes only and does not constitute medical advice. Hair loss has multiple potential causes and the right approach depends on your individual history, examination, and bloodwork. Speak with a qualified clinician before starting or stopping any treatment. See the full disclaimer.
About the author
Philippe Boissard
Author of Men’s Hairloss Protocol (2020), Better, Smarter, Stronger (2023), and Multi-Axis Body (2025). Researches and writes about hair loss and male physiology, citing primary literature and disclosing affiliate relationships in full. Not a medical doctor; all content is educational. More about Philippe.
Related reading
Get my free hair-loss protocol
The exact evidence-based routine I actually use and recommend: what works, in what order, with no hype. Enter your email on the next page and I’ll send it straight to you.
Send me the free protocol →
[…] three either. The photograph is the only thing that will tell you the truth. I have written a full photo tracking protocol for […]